· Esp32 · 4 min read
ESP32 Web Server (ESP-IDF)
The ESP32 is an ideal platform for creating connected IoT applications, and setting up a web server on this powerful microcontroller is straightforward with the ESP-IDF framework. In this guide, you’ll learn how to implement a web server on the ESP32, from configuring the network interface to handling HTTP requests. We’ll walk you through the steps of creating a web server, registering URI handlers, and sending responses back to clients. Whether you’re building a remote control interface, a data display, or any other web-based service, this tutorial will provide you with the foundation to get started with web server development on the ESP32.
Introduction
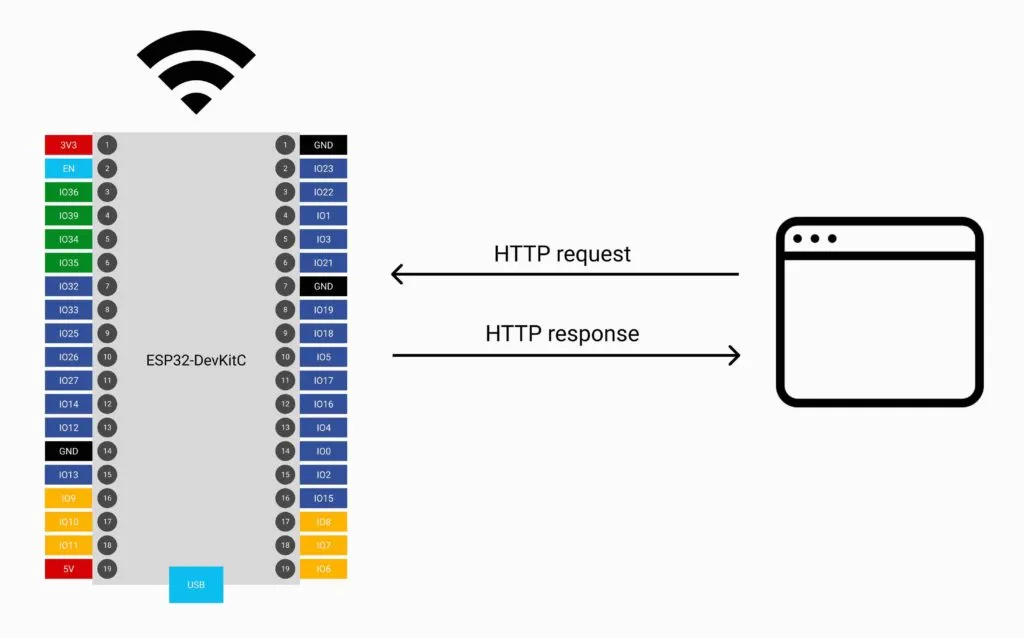
In this article, you will learn about implementing a web server on ESP32 using ESP-IDF framework. You will build a project in which ESP32 acts as an AP and other station devices can connect to it. You will then configure a web server on ESP32 so that stations can make http requests to get information from it. The following diagram illustrate the project
You need to do two tasks in this project:
- Configure ESP32 as an Access Point (AP)
- Configure ESP32 HTTP Server
Hardware Used
In this article, we will be using the hardware listed in the table below
| QTY | Component Name | Buy on amazon |
|---|---|---|
| 1 | ESP32 DevKit C | amazon.com |
Affiliate Disclosure: When you click on links in this section and make a purchase, this may result in this site earning a commission at no extra cost to you.
Configure ESP32 as AP
Firstly, you will configure ESP32 as an access point. You have learnt how to do it in previous article. Set the IP address of ESP32 to 192.168.1.1. Remember this address as you will use it in the next step when accessing the web server on ESP32.
Configure ESP32 HTTP Server
A HTTP Server receives HTTP requests from clients and send back HTTP responses. To create a HTTP server, you need to use ESP-IDF http server component. To use it, you need to include the header file esp_http_server.h.
#include <esp_http_server.h>Create a http server
To create a http server, you use the API httpd_start()
esp_err_t httpd_start(httpd_handle_t *handle, const httpd_config_t *config)This function allocates resources and creates a http server. After the server is created, it returns a handle of type httpd_handle_t. You need to create a handle variable in advance and pass its address as the first argument of this function. The second argument is a pointer to a configuration structure of type httpd_config_t. You can use macro HTTPD_DEFAULT_CONFIG() to create a default configuration. If the server is created successfully, ESP_OK is the returned value. Otherwise, an error code value is returned.
The following snippet shows how to create a server
httpd_config_t config = HTTPD_DEFAULT_CONFIG();
httpd_handle_t server = NULL;
if (httpd_start(&server, &config) == ESP_OK) {
    // Do something
}
Register URI handlers
Now you need to register URI (Uniform Resource Identifier) handlers. In this example, you will implement a HTTP GET request handler with URI /test, e.g. when you visit 192.168.1.1/test, the web server on ESP32 will send back a response, which in this case is a simple string. To register a URI handler, you use httpd_register_uri_handler() API:
esp_err_t httpd_register_uri_handler(httpd_handle_t handle, const httpd_uri_t *uri_handler)This function takes two arguments:
- handle is a variable of type httpd_handle_t which refers to the server that you create in previous step.
- uri_handler is a pointer to a constant structure of type httpd_uri_t. This structure contains definitions of the uri and which callback function is executed when a client access this uri.
For example, you can define a variable test_uri
httpd_uri_t test_uri = {
    .uri      = "/test",
    .method   = HTTP_GET,
    .handler  = test_handler,
    .user_ctx = NULL
};
and then register uri handler
httpd_register_uri_handler(server, &test_uri);Implement URI callback
Note that you have specified in variable test_uri that a callback named test_handler will be executed when a client access this uri. Now you need to implement this callback. In this example, you can write a very simple response which returns a string containing html h1 tag with Hello World text.
esp_err_t test_handler(httpd_req_t *req)
{
    const char resp[] = "<h1>Hello World</h1>";
    httpd_resp_send(req, resp, HTTPD_RESP_USE_STRLEN);
    return ESP_OK;
}
Here you have used the API httpd_resp_send() to send back a response to the connected client. HTTPD_RESP_USE_STRLEN is a macro to get the length of the string to be sent.
esp_err_t httpd_resp_send(httpd_req_t *r, const char *buf, ssize_t buf_len)Test the web server
Now you have implemented the web server. It’s time to build and flash the project to ESP32. Run
get_idf
idf.py build
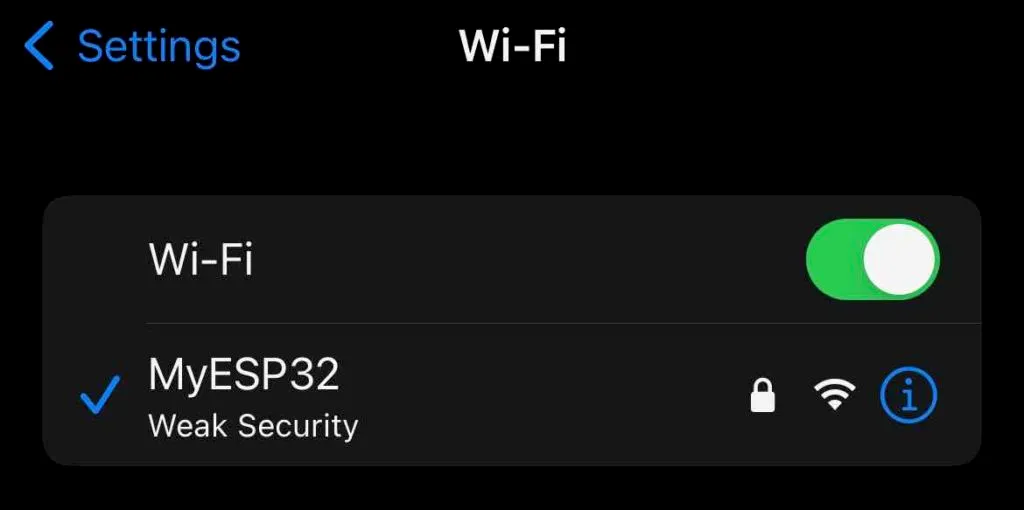
idf.py -p [PORT] flash monitorESP32 is now up and running. Open your phone and connect to ESP32. You should be a WiFi network with SSID MyESP32 in the list
Open a browser and go to address 192.168.1.1/test. You should see Hello World message on the browser.

If you can see the text, congratulation! You have successfully completed the project.
Wrapping Up
In this article, you have learnt how to build a web server on ESP32 that responses to HTTP GET requests from clients. Hopefully you find something useful and be able to start building more complex projects. Thanks for reading.